
After installing Windows Server 2016/2019, LACP can be configuring by following the steps in this tutorial. This can significantly improve your network throughput and create a resilient, fault-tolerant connection by grouping multiple physical network interfaces together.
This guide provides a straightforward, step-by-step process for configuring NIC Teaming through the graphical interface.
The Server Manager application should already be running. In case it is not, start it.
Step 1 - Opening the NIC teaming Interaface
Inside Server Manager, navigate to Local Server (this option can be found in the left sidebar).
Proceed by clicking on the blue Disabled link next to NIC Teaming.

Step 2 - Set up the LACP interface
In the top right corner of the NIC Teaming window, click on TASKS and select New Team.

In the new interface that poped up, enter a name for the team (example: bond) and select the interfaces you want to use for the bond you are setting up by checking the checkboxes that appeared next to them.

Proceed by clicking on Additional properties and selecting LACP as the Teaming mode.
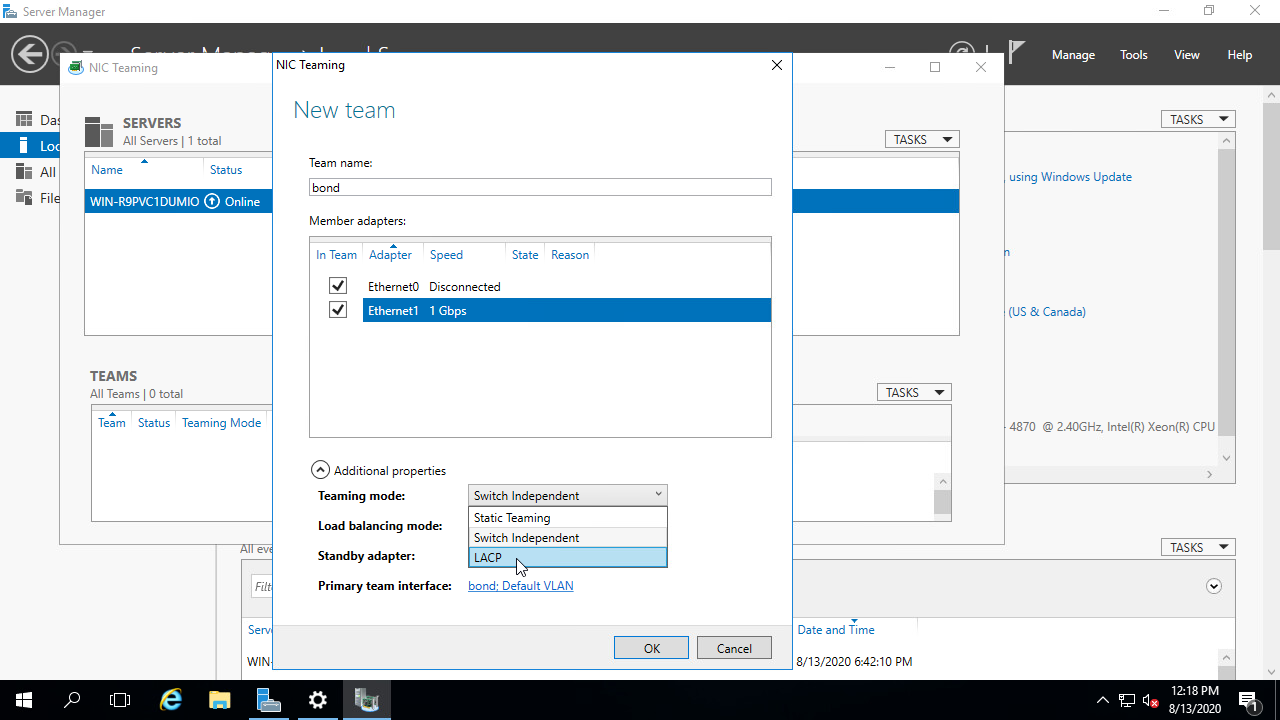
After selecting LACP in the Teaming mode, click on OK and the interface will be created.
Step 3 - Configuring an IP address
This will not be covered in this guide, now you can go ahead and configure an IP address in on the bond interface like you would normally do on the standard interface in a server.
After this is done, your server should have internet connectivity.

In case you are running into issues, feel free to contacting our support department by creating a ticket in the portals.